Purpose
This is an environmental test to assess the robustness of an AR coating, its ability to adhere to a hardcoat, and the hardcoat’s ability to adhere to a lens.
Scope
This document covers any testing done on a lens from any customer.
Definitions
- n/a
Responsibilities
- Lens Tester – Person responsible for performing all aspects of lens testing after the lenses have been delivered by receiving.
Materials and Equipment
- Burner*
- Burner Plate*
- Lens Holder*
- Gloves*
- Material #1*
- Material #2
- Crosshatch Tool*
- Scotch Brand Tape #600, 1″ Wide*
- Timer*
- Lint-Free Wipes*
- Deionized Water
- 1 Glass Beaker*, Able to Hold 2000 ml of D.I. Water
- 1 Plastic Beaker*, Able to Hold 2000 ml of D.I. Water
- Inscribing Tool*
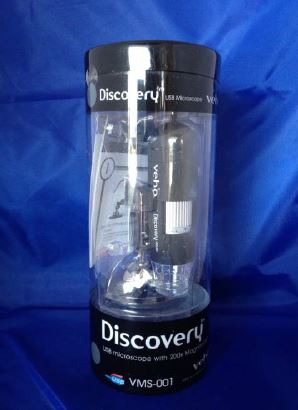
- USB Microscope*
- Mild Dish Detergent*
- Soft Synthetic Sponge*
- Dry Compressed Air
- Data Sheet – FRM-0027
*Item included with Salt Water Boil Kit (SW-00001-4)
Procedures
- Receive lenses of each type and coating for Salt Water Boil with Crosshatch Adhesion testing (a minimum of three lenses is recommended).
- Clean the lenses.
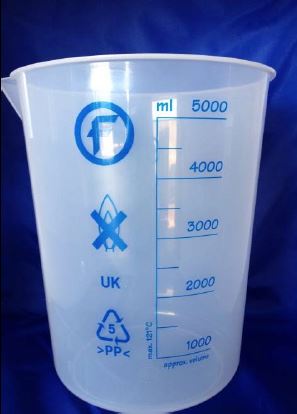
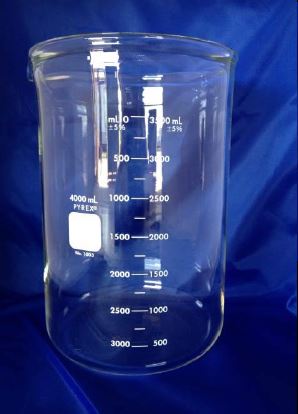
- Fill the plastic shock beaker (Image 1), and glass boil beaker (Image 2) with deionized water (D.I. Water).
- Bring D.I. water to test location.
- Keep containers filled:
- Fill glass beaker (used to boil lenses) to 1750 ml. The beaker must always be filled to this mark. Add D.I. water as needed during testing process between boil cycles.
- Fill plastic beaker (used to shock lenses) to 2000 ml.
- Additional D.I. water should be kept on hand to refill beakers as necessary.
- When additional water is added to glass beaker, the salt water solution must be allowed to return to a boil before continuing testing procedures.
- Keep containers filled:
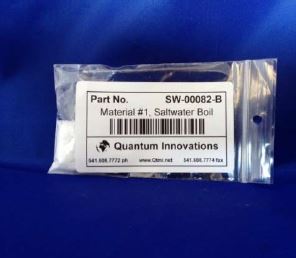
- Add salt water bag Material #1 (Image 3) to glass beaker that is filled with 1750 ml D.I. water.
- Add salt water Material #2 (Image 4) to glass beaker that is filled with 1750 ml D.I. water.
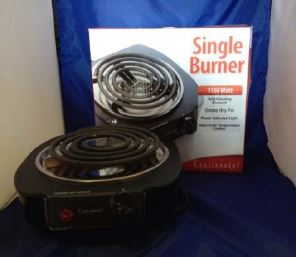
- Place burner plate (Image 5) on burner (Image 6). Place boil beaker with D.I. water and salt solution on burner plate. Bring water to boil. Stir salt water solution occasionally to make sure water and salts are well-mixed.
- Note: Covering glass beaker will help maintain consistent water temperature. D.I. water must remain at a steady boil.
- Begin new log sheet to track test results.
- Put on gloves.
- Mark identification numbers near the edge of the lens with engraving tool.
- Identification should include:
- Date of test
- Lens ID (A, B, C, etc.)
- Coating identifier, short abbreviation to allow for easy identification in log book
- Identification should include:
- Enter info into the log book:
- Date
- Lens manufacturer
- Lens type
- Lens material
- AR coatings
- Hard coat
- Tested by
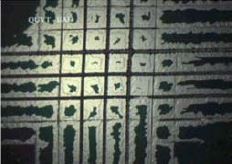
- Use your crosshatch tool (razor blade) to create crosshatching 5-10 mm from edge of lens.
- Crosshatching must be six equally spaced vertical lines and six equally spaced horizontal lines.
- Clean off lenses with lint-free wipes.
- Take off the exposed piece of tape (from the clear tape roll) and throw it away so that you can start the test with clean tape (dust can collect on tape in between test days).
- This step is only required at start of test.
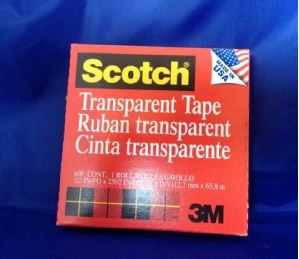
- Take a 3-inch piece of Scotch Brand #600 tape (Image 7), and smooth it across the crosshatching.
- Note: The tape should extend past the crosshatching by at least 1/2″.
- Wait 30 seconds and rapidly rip off tape.
- Make general visual inspection of entire lens surface. Look for defects such as stains, smears, streaks or cloudiness, etc. in the lens and coatings. Record findings prior to beginning salt water boil testing.
- Your lab’s high intensity lamp and a black background can help make this easier and produce more detailed results.
- Make visual inspection of coating at the crosshatch intersections. Refer to the crosshatch chart in Appendix B and enter your findings on the log sheet.
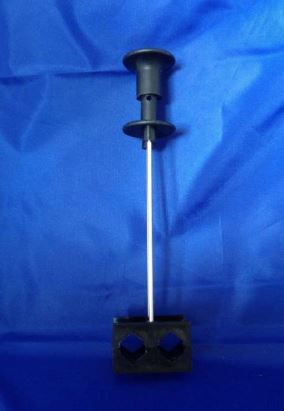
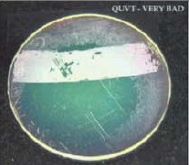
- Place lenses in the holders (Image 8) with the concave side facing the metal rods.
- Repeat steps 9-17 for all lenses.
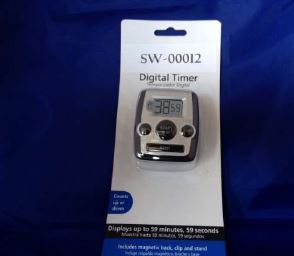
- Set timer for 2 minutes (Image 9).
- Place lenses in boiling salt water solution.
- Start time.
- When timer goes off, quickly remove lens holder and place in plastic shock beaker.
- Tongs may be helpful to move from one container to the next to avoid burns from water.
- Set time for 1 minute.
- When timer goes off, remove lenses from plastic shock beaker.
- Use lint-free wipe to gently dry lenses.
- Use USB microscope (Image 10) (after installed on computer according to manufacturer’s instructions), high intensity lamp and black background to examine lenses. Compare to charts in Appendix B. Look for:
- Delamination
- Crazing
- Cracking
- Orange Peel Affect (resemblance in texture)
- Enter findings in log book on a scale of 5-0.
- See classification ratings in Appendix A.
- Effects on the outermost edge of the lens (<1cm) do not impact the test results.
- Repeat steps 20 – 28 six times to all lenses.
- Record all findings.
- Notes: Make sure to keep glass beaker boiling (on burner) at 1750 ml.
- Make sure the plastic shock beaker stays at room temperature. Refill container as necessary to help regulate temperature of shock beaker, as the water can being to heat up from the temperature of the boiled lenses.
- Report test finds as appropriate.
Appendix A: Definitions
Crosshatch
Crosshatch Definition: A group of squares formed on the surface of a coating by cutting a series of parallel lines in one direction then cutting a second series of parallel lines at 90 degrees from original lines.
Crosshatch Classification (X Effects on the log sheet)
Score 5: The edges of the cuts are completely smooth; none of the squares of the crosshatched area are detached.
Score 4: Small flakes of the coating are detached at the intersections of the squares. Less than 5% of the total area affected.
Score 3: Small flakes of the coating are detached along the edges and at intersections of cuts. The area affected is 5 to 15% of the total area.
Score 2: The coating has flaked along the edges and on parts of the squares. The area affected is 15 to 35% of the total area.
Score 1: The coating has flaked along the edges of the cuts in large ribbons and whole squares are detached. The area affected is 35 to 65% of the total area.
Score 0: Flaking and detachment worse than score 1.
Delamination
Delamination Definition: When a coating lifts off the lens surface.
Classification DC: Relates to a dual coated product where both a hard coat and a thin film coating has been applied and together are delaminating (ie. Hard coat and thin film).
DC-Delamination: Complete coating detachment classification (DC Effects on the log sheet).
Score 5: No delamination of individual layers over entire lens surface.
Score 4: Partial delamination of individual layers, up to 25% of the surface.
Score 3: Partial delamination of individual layers, up to 75% of the surface.
Score 2: Total delamination of individual layers over the entire lens surface.
Classification DI: Relates to either a single layer hard coat or the thin film coating where one is delaminating and where one or both have been applied to the lens depending on the product type (ie. HC, thin film, HC and thin film).
DI – Delamination: Complete Interlayer Detachment Classification (DI Effects on the log sheet)
Score 5: No coating delamination of all layers from the lens surface.
Score 4: Delamination of all layers up to 25% of the surface.
Score 3: Delamination of all layers of to 75% of the surface.
Score 2: Complete coating delamination over the entire lens surface.
Crazing
Crazing Definition: Fine cracks will appear and be joined at right angles to one another. When the coating does this, it is said to be crazed. Crazing is often caused by a mismatch in the
thermal expansions of surfaces. The coating is pulling away from itself in this case.
Crazing Classification (C Effects on the log sheet)
Score 5: No visible crazing.
Score 4: Hairline crazing, only just visible points or cracks.
Score 3: Hairline crazing up to 25% of the lens surface.
Score 2: Hairline crazing up to 75% of the lens surface.
Score 1: Hairline crazing over the entire lens surface.
Score 0: Severe fern-like or mat-like crazing over any region of lens.
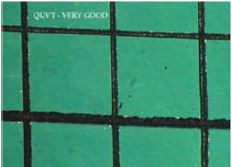
Appendix B: Crosshatch Ratings
Classification 5: All edges of cuts are clean and crisp and there is no peel off or crazing in cross hatched area or out of it.
Classification 4: All edges of cuts are clean and crisp and there is no peel off in the cross hatched area. Crazing has same reflection as coating.
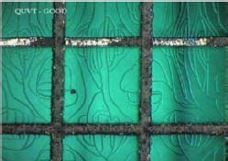
Classification 3: All edges of cuts are clean and crisp and there is no peel off in the cross hatched area. Crazing has white reflection. Crazing ≤ 20 microns wide.
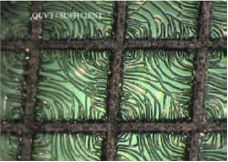
Classification 2: The coating has peeled off along the edges of the cuts and on parts of the squares. Crazing very evident with white reflection. Crazing ≤ 40 microns wide average.
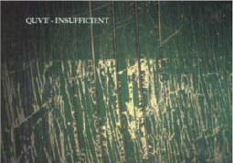
Classification 1: The coating has peeled off in large areas. Crazing very evident with white reflection cross hatched area and/or out of it. Crazing greater than 40 microns wide average.
Classification 0: Peeling and detachment is very evident/visible after tape pull in cross hatched area and/or out of it.
Appendix C: Images