Purpose
This process ensures the coating displays the correct characteristics.
Scope
This document covers spectral testing done on a lens from any customer.
Definitions
- Spectral: Way to measure and analyze the optical characteristics of a coating.
Responsibilities
- Lens Tester: Person responsible for performing all aspects of lens testing after the lenses have been delivered by receiving.
Materials and Equipment
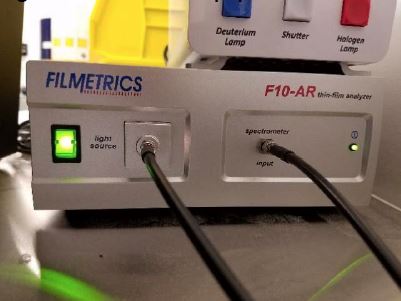
- F10 AR Unit
- Probe
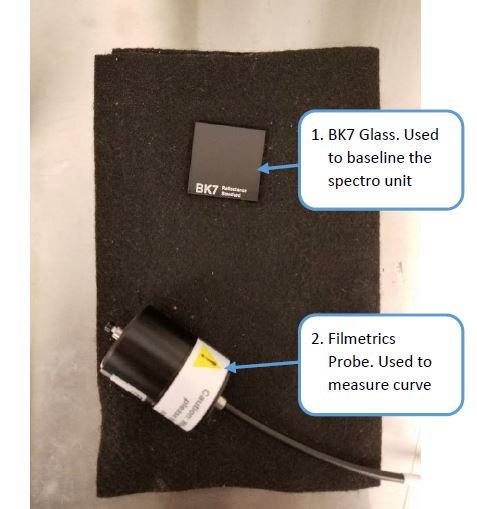
- BK Reflectance Standard
Procedures
Calibration
- Turn on power to the Filmetrics unit. Unit must be on for at least 5 minutes before a reading can be taken. (Figure 1)
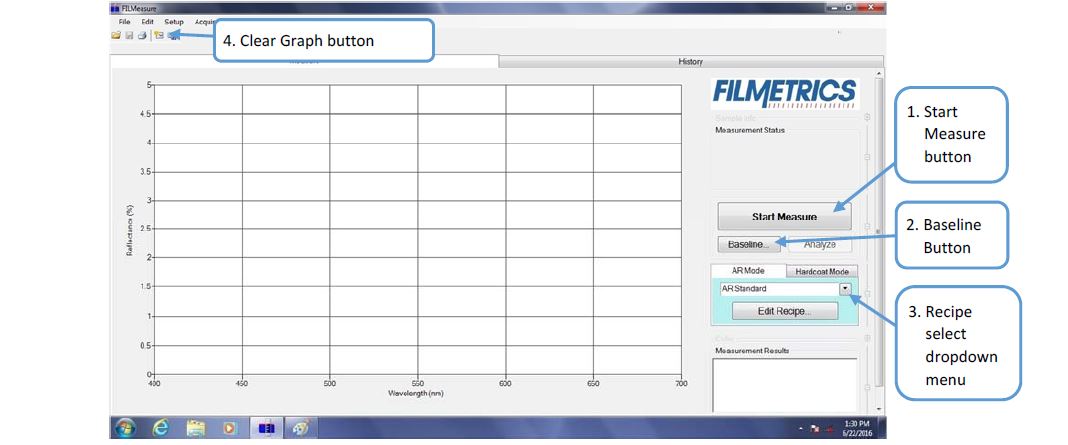
- Open Filmetrics software and select AR mode. (Figure 3)
- Click the “Baseline” button. (Figure 3.2)
- Follow the on-screen prompts.
- Move the contact probe at an angle keeping one side of the contact probe in contact with the BK7. (Figure 2.1)
- Press “OK” on the Filmetrics program.
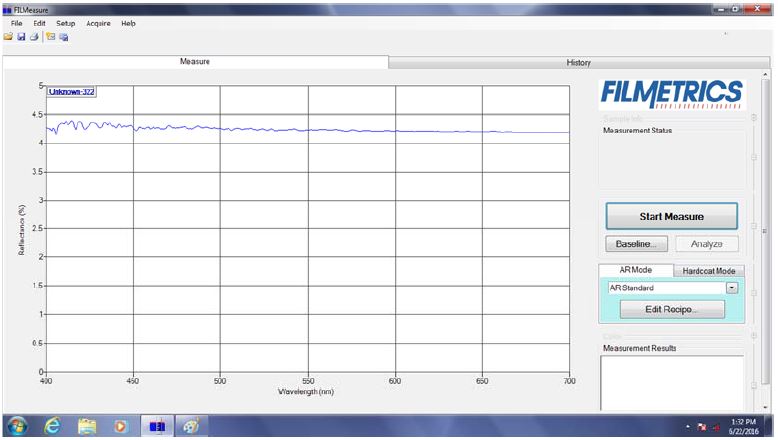
- Place contact probe on the BK7, and press measure on the main screen. (Figure 7)
- At 500 nm, the line should be between 4.1% and 4.3%.
- If you have a reading other than this, repeat the baseline process.
Measuring a Coating
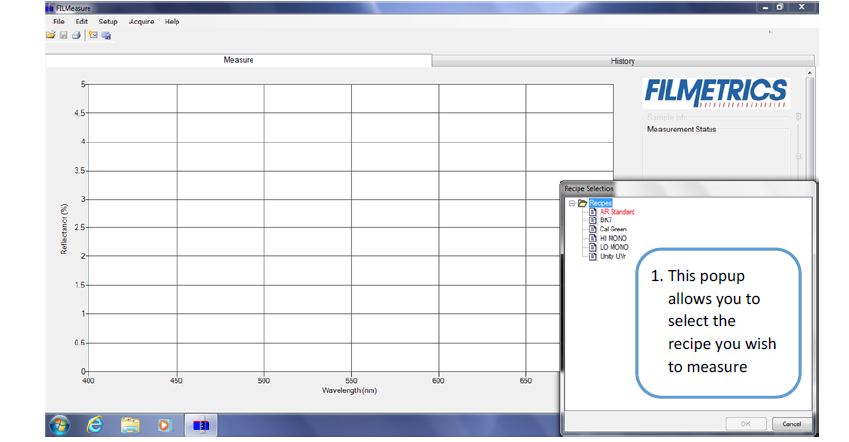
- On the right side of the screen, select the recipe dropdown button and then select the recipe that you will be measuring. (Figure 5.1)
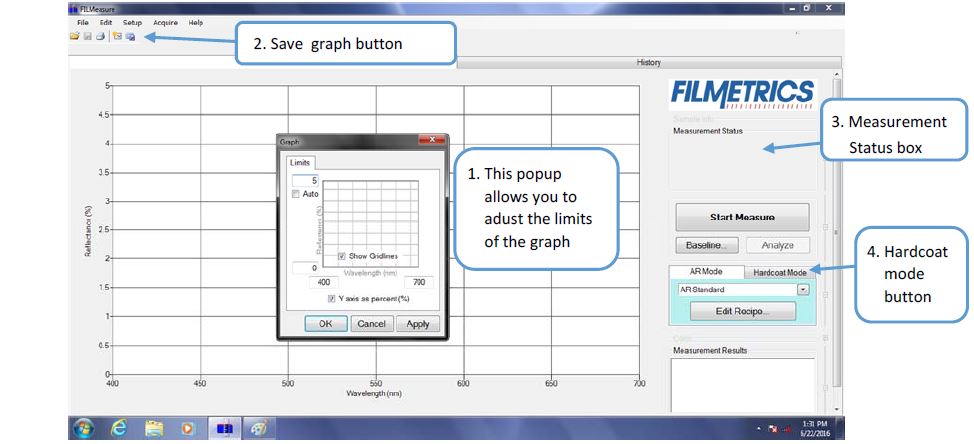
- Adjust the reflectance maximum to accommodate what you are coating you and you are measuring. (Figure 4)
- Double click on the graph field.
- Adjust the upper left field to the appropriate maximum.
- Ensure that both the “Measurement Status” and “Measurement Results” are expanded.
- Place the lens to be measured on the black felt cloth (Figure 2)
- Press the probe down firmly in the center of the lens.
- Click the “Start Measure” button on the right hand side of the screen. (Figure 2.1)
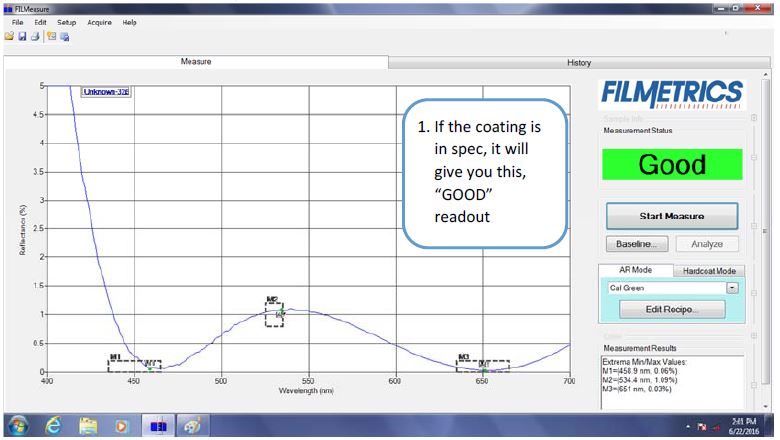
- Verify that the “Measurement Status” box says “GOOD” and is green. (Figure 8)
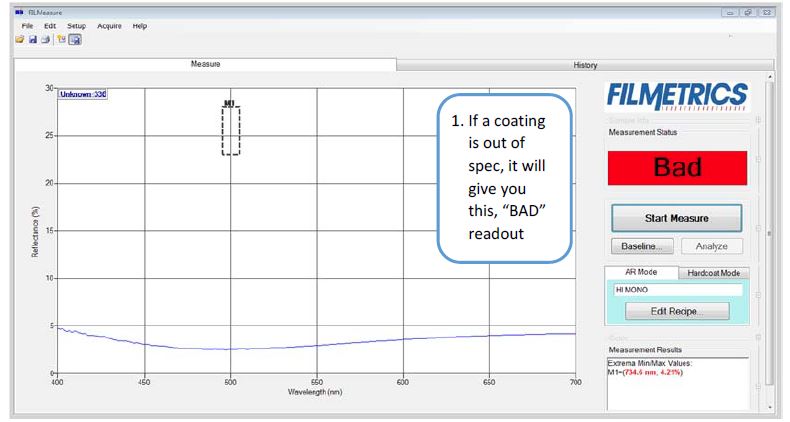
- If the “Measurement Staus” box says “BAD,” the coating is out of spec. (Figure 6)
Measuring Hardcoat Thickness
- Select “Hardcoat Mode.” (Figure 4.4)
- Place probe on lens.
- Select “Start Measure.”
- Hardcoat thickness measurement will appear in the “Measurement Status” box. (Figure 4.3)
Saving Spectral File
Save all spectral files for customers in the customer folder on teh Y: drive by selecting the save icon in the top left corner (Figure 4.2) and saving the files to the following file location:
Y: > Technical Support Team > Test Lab > Results > Customer Tests > Select Customer > Select correct year > Name the file what the lens is labeled